Set a fixed IP on your Raspberry Pi
Important: When setting a permanent ip make sure the ip address is not in use, if the ip address is already in use by a different device in a network then it can cause conflicts. You may need to change the configuration on the other device and provide a new ip to the conflicting device.
Method 1: Set a fixed IP using your Router: These steps can vary depending on your router, kindly see the documentation or videos of your ISP and router for the steps.
Method 2: Set a fixed IP using Raspberry Pi OS :
Note: this configuration is dependent on the OS, if you uninstall or change the memory card the ip address will not remain the same.
- Enter the Network Manager TUI:
sudo nmtui

-
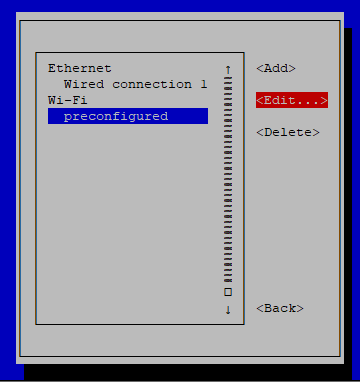
In Network Manager, use Arrow Keys to scroll and Enter to make a selection.
-
Select Edit a connection and press enter

- Select your network type and click on edit:
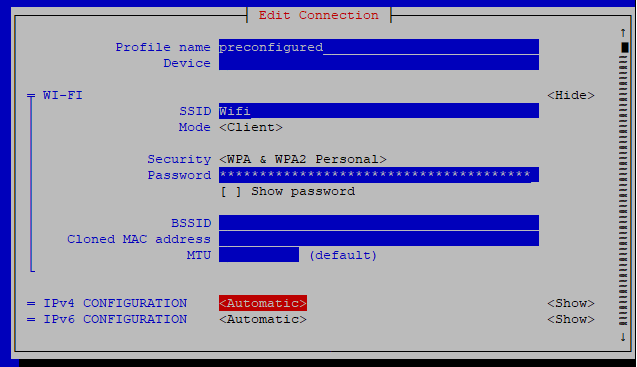
- Scroll down to IPv4 Configuration:
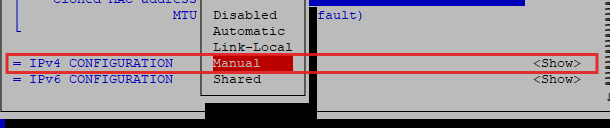
- Change the IPv4 Configuration from Automatic to Manual and then select show:
- Enter the IP Address Manually and press right arrow to move out:


-
After entering the IP Address, enter the Default gateway (router’s ip address) and the DNS (8.8.8.8).
-
Scroll to the bottom and select ok to save the configuration.
-
Exit from the Network Manager and restart the Network Manager or Reboot your Raspberry pi to apply the changes:
sudo systemctl restart NetworkManager

sudo reboot
