Raspberry Pi OS - Installation
- Download the Raspberry Pi Imager from the official website:
https://www.raspberrypi.com/software/
- Make sure the Memory card/HDD/SSD is connected.
- Run the installer and you will be greeted with a screen to choose:
-
Raspberry Pi Device
-
Operating System
-
Storage
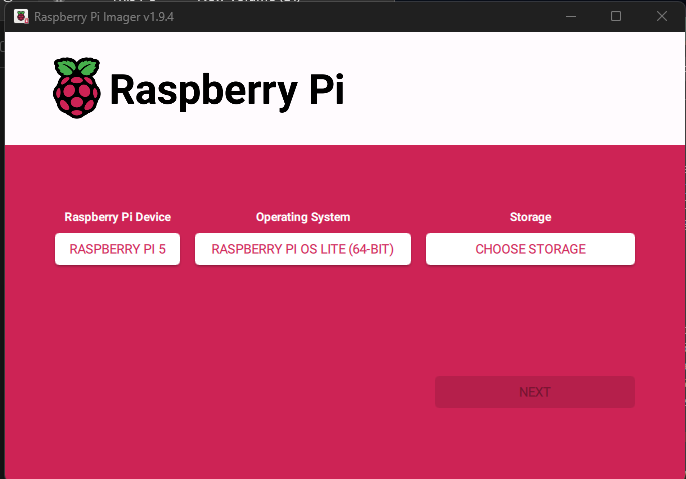
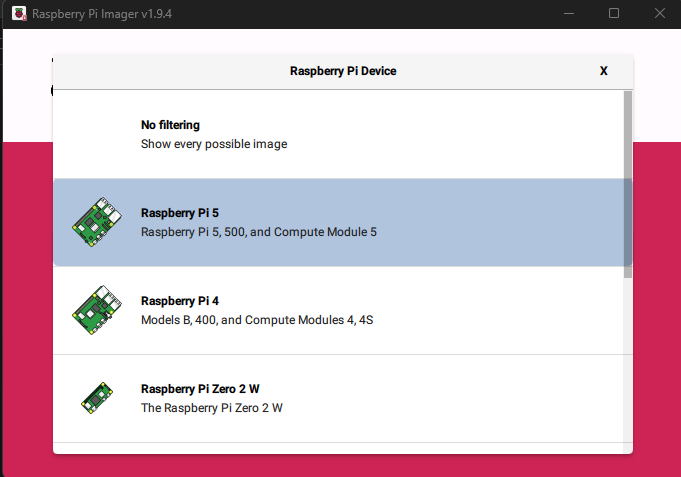
- Select the Device Type based on the Raspberry Pi device you are using, example Raspberry Pi 5.
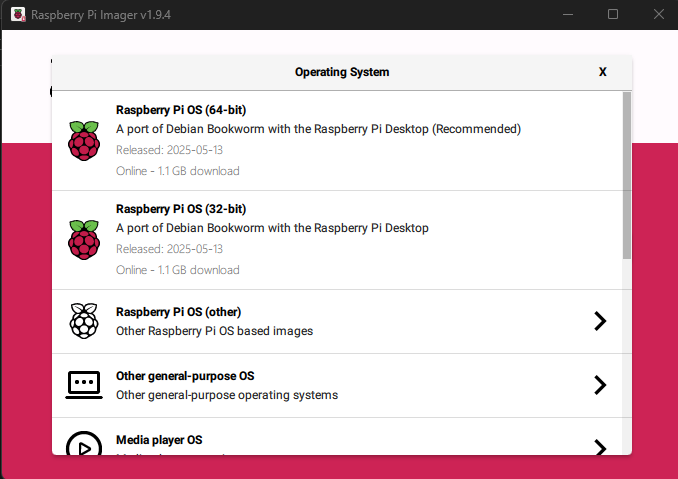
- Choose the OS as per your requirement:
-
Raspberry Pi OS with Desktop (64bit/32bit)
-
Raspberry Pi Lite OS without Desktop (64bit/32bit)
-
Others
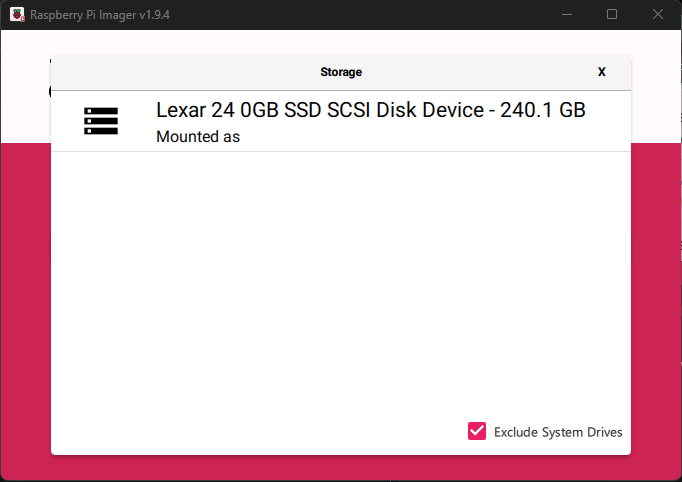
- Select the connected storage and click next
(Note: all the data on the storage will be wiped)
- The imager will now ask: Would you like to apply OS customisation settings?
-
EDIT SETTINGS
-
NO, CLEAR SETTINGS
-
YES
-
NO
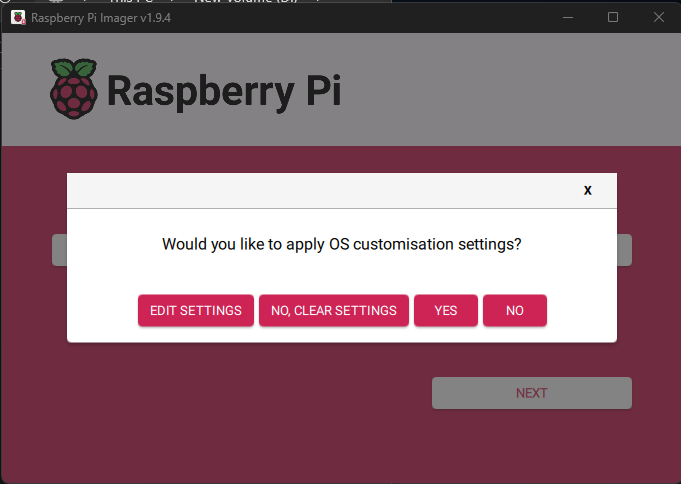
- Select EDIT SETTINGS and this will open a popup window:
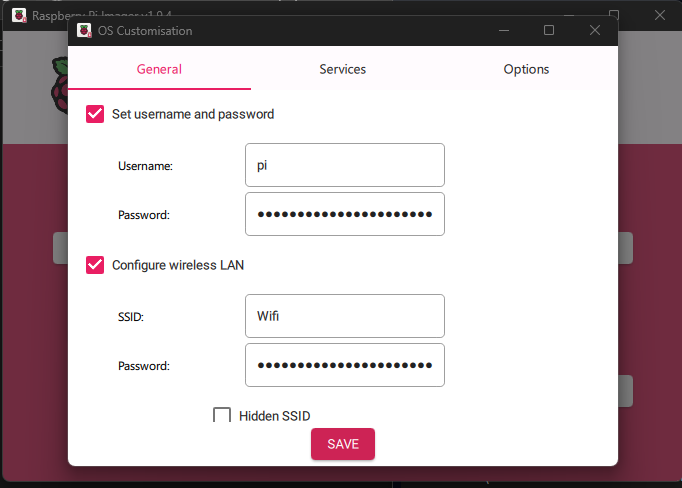
Under General:
-
Set the hostname, Username and Password as per your requirements.
-
If you are doing a Headless Install (without a Display Keyboard and Mouse) then make sure to configure the Wireless LAN by entering your WIFI SSID and Password.
(Note: ensure to select LAN Country as US, selecting a different country may not work)
- Select your Time zone and Keyboard layout.
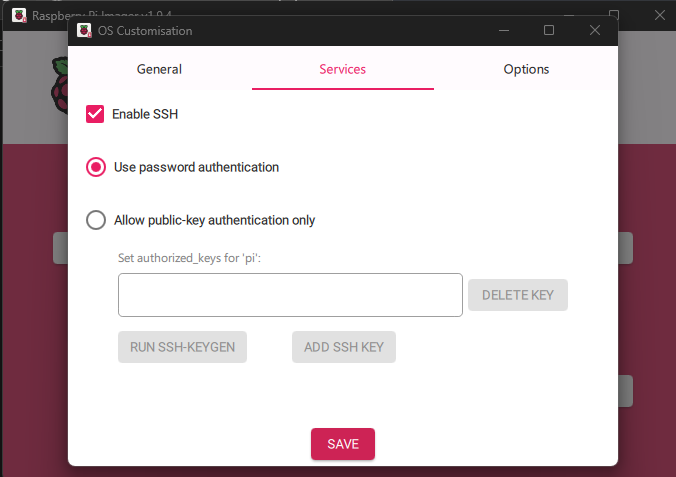
Under Services:
-
Make sure to select Enable SSH (this is important if you are doing a Headless Installation)
-
You can keep the option for use password for authentication in most cases.
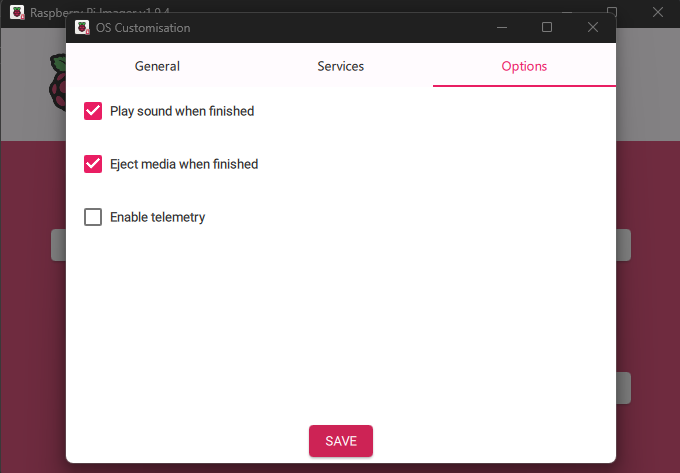
Under Options:
-
Change the settings as per your requirements
-
Hit save and this will start writing the image on to the connected drive/memory card.
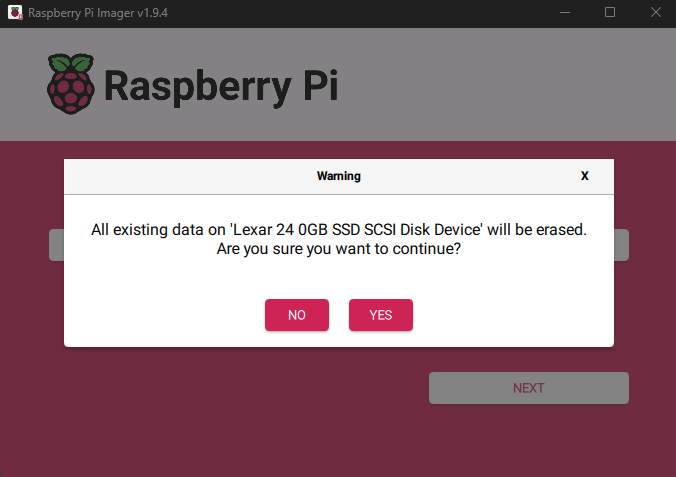
- Imager will now ask for the final time if you want to continue with the installation, select yes and this will start the OS installation on the connected storage.
- When the write completes, the Imager will prompt you to continue after which you can remove the connected storage.
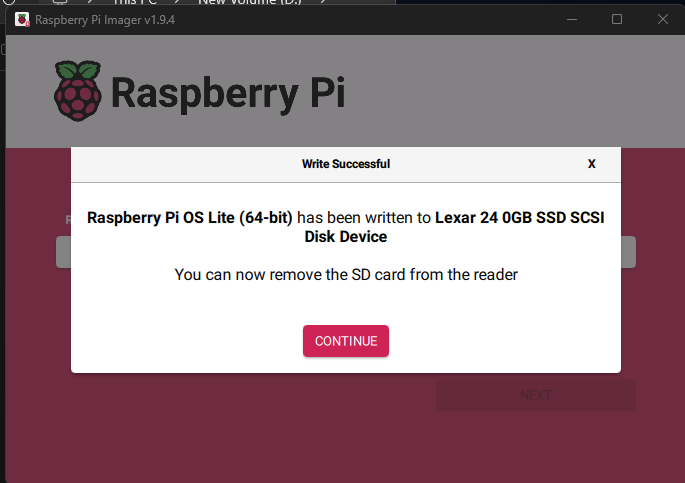
- Insert the Storage to your Raspberry Pi and then power on the Raspberry pi to use the newly installed Operating System.
- If you have done a headless install then, use Putty or any other SSH client to connect to the device.
Know the IP of your newly connected Raspberry Pi
Method 1:
-
Login to your Router and go to the connected devices list.
-
Once you have the list, power on the raspberry pi and after a minute look for any new device connected on the router.
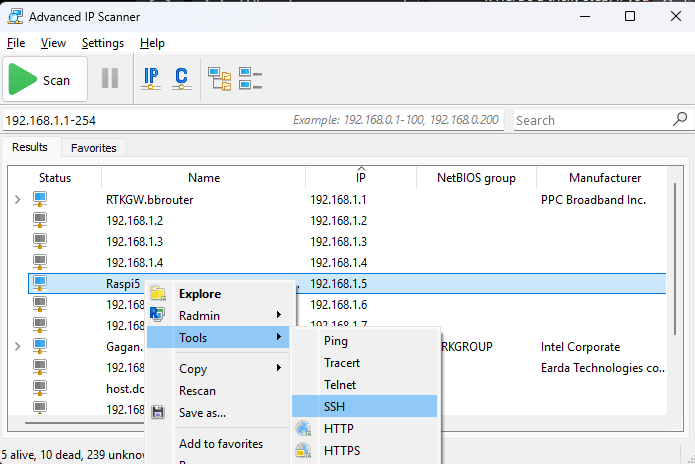
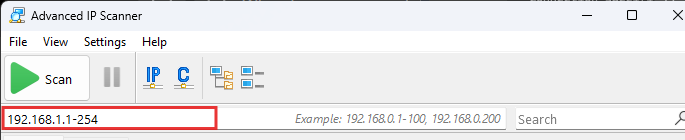
Method 2:
-
Install and run Advanced IP Scanner
-
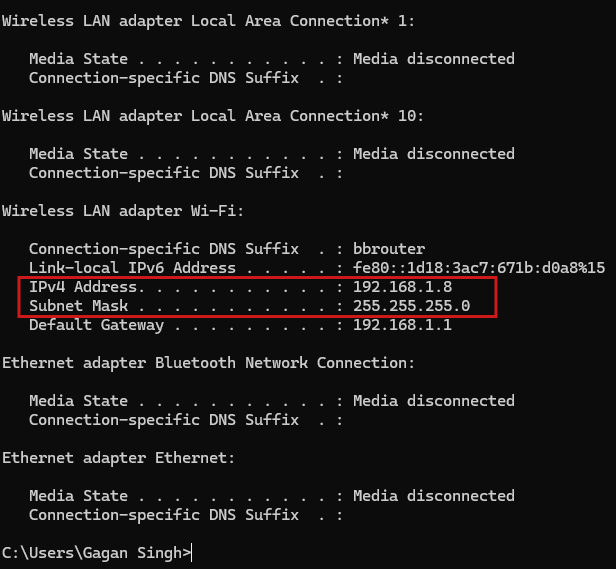
Usually the ip address for home environments is between 192.168.1.1 - 192.168.1.254), however we can try to check the range by checking the ip of another device connected on the same network. In Command line/Terminal search for:
Window: ipconfig
Linux/mac: ifconfig
example:
- Enter the ip range and hit scan
- Once you have the list of devices, then power on the raspberry pi and after a minute, perform a new scan to find the Raspberry pi’s IP Address.
Pro tip: you can right click an ip and select SSH under Tools in case you don’t want to use Putty for SSH.